RSS Feed

Tag Archives: dairy-free

Spinach frittata

SpinachFrittata_TBCP_2

As you know I’m in the midst of doing The Body Confidence Program. Because it’s a high-protein diet that doesn’t allow dairy and greatly limits fruit, the biggest change to get used to has been at breakfast time.

To be honest, after 6 weeks I’m still struggling having to cook breakfast most mornings instead of throwing together my usual granola with yogurt and fruit, or grabbing overnight oats from the fridge. But, I have to admit, a cooked breakfast full of protein definitely keeps me going, without my tummy wanting a snack, right up to lunchtime.

One of my favourite breakfast options on the program is the spinach frittata. Surprisingly tasty for such few ingredients, after you’ve made it a couple of times it’s very quick and easy to make even first thing in the morning. Before starting the program I would have been tempted to throw in some bacon and possibly some cheese as well. Trust me; it doesn’t need any additions at all.

You can easily halve the recipe to make just one serving, but leftovers can be eaten cold or quickly heated up for another breakfast, an easy lunch or even a snack.

Spinach frittata

Prep time: 5 mins
Cook time: 10 mins
Serves 2

1 tbsp coconut oil
1/2 red onion, thinly sliced
50g spinach
4 eggs
60 ml almond milk
pink Himalayan salt and ground black pepper to taste
pinch of paprika (optional)

Preheat your grill to high.

In a medium ovenproof frying pan, melt the coconut oil over a medium heat.

Add the onion and cook until just starting to brown. Add the spinach and toss for a minute or two to wilt, then remove from the heat and set aside.

Beat the eggs in a bowl and whisk in the almond milk. Add salt, pepper and paprika (if using).

Put your pan back on the heat. Evenly spread the onion and spinach in the pan and gently pour in the eggs. Cook until you see the mixture start to set at the bottom of the pan with the top still quite runny. Immediately turn the heat off.

Place the frying pan under the grill for 2 to 3 minutes or until the frittata is golden and cooked through.

Serve either hot or cold.

SpinachFrittata_TBCP_1

What are your favourite breakfast dishes that keep you going till lunchtime?

Frozen fruit pops

Frozen fruit pops

Summer has come and gone in the UK. It wasn’t a bad one at all this year, in fact I got a tan during a British summer for the first time! However I’d be lying if I said I was anything but ecstatic that we’re finally away on holiday enjoying a very hot sun on a wonderful beach.

During our summer at home, Nicholas and I got into a regular habit of going to a park a little way from home that’s much bigger than our neighbourhood ones. For warm days its paddling pool was perfect. Our ritual was paddling pool followed by a lie in the sun, moving to the large sand pit followed by all the other playground attractions. Then we’d go find the ice cream man and have a run round the park before coming home.

Of course a British summer wouldn’t be a British summer without some rain, and not just a summer shower but days of torrential rain! (I wrote my cheeky views of the summer in the UK here.)  When we couldn’t go outside and enjoy an ice lolly, we’d improvise a picnic inside and eat frozen fruit pops to make the day sunnier.

There really is nothing simpler than frozen fruit pops. Well you could just throw some fruit pieces into the freezer, but then you’d be missing the fun aspect of the stick. Why does putting food on a stick much it so much better?!?

You need plastic cake pop sticks or wooden ice lolly sticks. Don’t use wooden skewers as these can be dangerous for little ones and they’re not as easy to hold on to.

Next chop up some fruit into bite-sized pieces. We used strawberries and grapes. You can also use banana, watermelon (cut in chunks or balls), raspberries, blueberries and mango.

Thread your fruit onto the sticks, put on a freezer-proof plate or tray and put into the freezer for at least 2 hours. Once they’re frozen you can keep them all together in a freezer bag.

A healthy fun treat for summer days, or when you’re wishing for the return of summer days.

What were your favourite things to do together this summer?

Aussie saltbush damper

This week’s Great British Bake Off was all about bread, something I have a love/hate relationship with when it comes to baking it.

I used to love baking bread and wasn’t too bad at it, then came a period where it never seemed to go right. The only bread I tend to make at the moment are these bread rolls which are super easy and very slightly adapted from my friend Barbara’s recipe. If you’re at all interested in baking bread you must check our her wonderful blog all about bread and things that accompany it.

I tried to face my bread demons with an attempt at baking an amazingly pink beetroot bread. What I learnt was I must always check the type of yeast I’m using and how it’s meant to be activated! My bread was a fabulous colour but didn’t rise properly and so didn’t cook properly.
My beetroot bread failure

I wasn’t sure I’d manage to try some more bread as we’re going on holidays at the weekend, so there’s the usual pre-holiday panic of packing and getting on top of work. But when I was putting away the Aussie herbs and spices hubby brought back from a business trip quite a while ago, the jar of saltbush caught my eye, in particular when I read the label explaining its use in damper.

Damper is a traditional Australian bread, typically baked in the coals of a campfire and gets its name because the fire is damped to then cook the bread amongst the hot coals. Damper can also be wrapped around a stick and cooked over a fire.

Originally made by stockman who might be in the outback for weeks or months with only basic provisions, it consisted simply of flour and water without any raising agent. Now people tend to use self-raising flour or add baking powder, as well as add butter and milk to the dough.

Saltbush is a very hardy long-living shrub that doesn’t mind droughts and is very common in the dry inland of Australia. As its name suggests, its dried leaves have a salty ‘herby’ taste which were used in the past along with the ground roasted seeds by indigenous Australians mainly to flavour damper.

I decided to do a dairy-free take on a modern damper recipe using the saltbush for an authentic outback flavour.

dairy-free

AUSSIE SALTBUSH DAMPER

Prep time: 10 mins
Cook time: 30-35 mins
Makes 8 servings

250g plain self-raising flour
200g wholemeal self-raising flour
2 tsp saltbush
1 tsp salt
100ml oil (I used extra virgin olive oil)
300ml cold water
1/4 tsp saltbush, extra

Heat the oven to 200C and line an oven tray with baking paper.

In a food processor, combine the plain and wholemeal flours, saltbush, salt and oil until the oil is fairly evenly distributed.

With the motor running, pour in the water a little at a time until the dough has just come together in a ball (you might not need all the water).

Tip the dough out onto a floured surface and very briefly knead (about 1 minute) then form into a round shape.

Place the dough onto your prepared tray. Dip a sharp knife into flour and score the top in a star pattern to create 8 wedges. Sprinkle the extra saltbush over the top.

Bake for 30-35 minutes until lightly golden and when you tap the bottom it sounds hollow.

Cool on a wire rack for a few minutes.

Best eaten warm as a large chunk in your hand, with lashings of butter and perhaps some good cheese or a bowl of soup on the side.
dairy-free damper bread

Variations:

  • omit the saltbush (difficult to get outside Australia) and replace with chopped fresh rosemary
  • sprinkle with Parmesan before baking
  • add chunks of cheese to the dough when kneading for a cheesy damper
  • use beer instead of the water to get a yeasty flavour
  • use your hands instead of the food processor to mix the dough (great for little ones to get involved)

Please share some of your easy/foolproof bread recipes so I can beat my bread demon!

I’m joining in with the Great Bloggers Bake Off. Visit Mummy Mishaps to see some more successful attempts than mine at leavened bread!
gbbo-badgesmallI’m also linking up to Supergolden Bake’s #CookBlogShare party.
cookblogshare

Dairy-free strawberry bread

One of the foods that shouts ‘SUMMER!’ to me is strawberries and when I recently bought too many punnets of them at the supermarket (who can resist a ‘buy one get one free’ offer?), I thought I’d use some of them to bake a lovely sweet treat.

strawberry loaf

This recipe is an adaptation of my dairy-free banana bread although I’ve reduced the sugar content a little (you could reduce it even more if your strawberries are wonderfully sweet). Regular readers will know how much I love to decrease the sugar in recipes before my taste testers can tell the difference ;).

Perfect for breakfast, afternoon tea or dessert, enjoy a little taste of summer to make your day better (I guarantee it!).

DAIRY-FREE STRAWBERRY BREAD

Prep time: 10-15 mins
Cook time: 40-45 mins
Makes 1 loaf
Freezable

175g self-raising flour
2 1/2 tsp baking powder
150g golden caster sugar
2 eggs
1/4 cup vegetable oil
Approx. 300g strawberries, hulled and chopped into small pieces
50g walnuts (or pecans), chopped

Preheat the oven to 160C. Line a loaf tin with baking paper.

Take a couple of spoonfuls of flour from your 175g of self-raising flour and put into a small bowl. Lightly stir your strawberries through the small amount of flour (this will stop them sinking to the bottom of your bread while it cooks).

Whisk the sugar, eggs and oil together at a medium speed using a handheld beater or in an electric mixer. Whisk for a few minutes until it’s pale and fluffy.

Sift in the flour and baking powder, and mix until combined using a low speed. Gently stir through the strawberries and walnuts.

Pour into your prepared tin and bake for 40-45 minutes until a skewer comes out clean.

Variations:

  • Make individual muffins instead of a loaf (easier to freeze if you’re not going to eat all of it)
  • Dust with icing sugar

Dairy-free hot cross buns

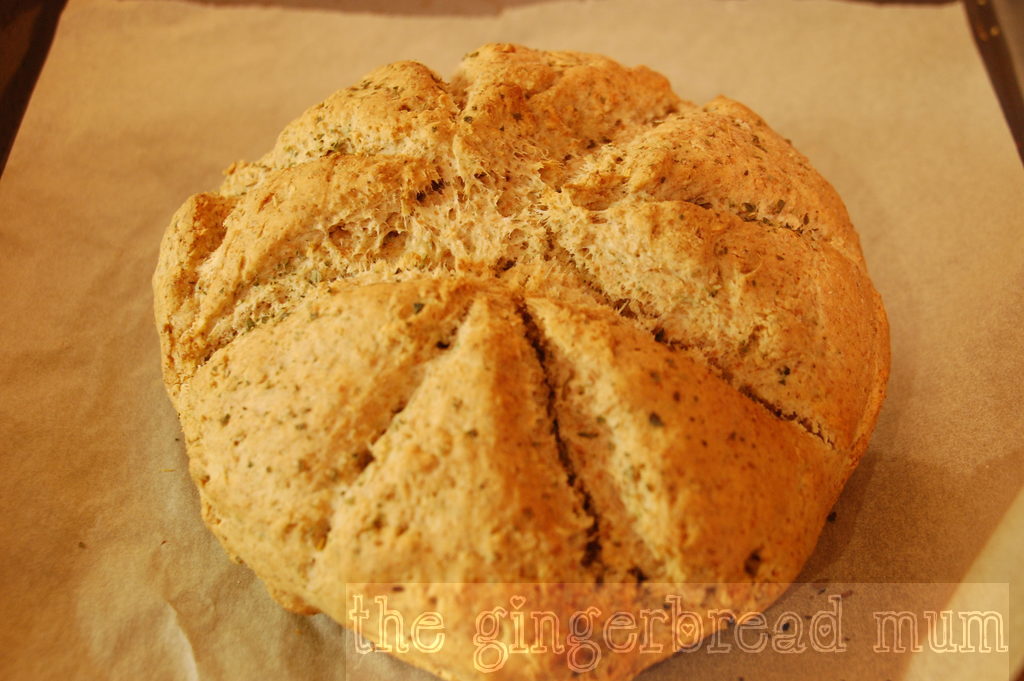
This time last year I made my very first attempts at making hot cross buns using a wonderful Paul Hollywood recipe, and I was very proud of the results.

hot cross buns

My not too shabby efforts at making hot cross buns last year.

This year I’ve been experimenting with a dairy-free version as we’re spending Easter with our dearest friends and godson, one of whom is lactose intolerant. I used last year’s recipe as a starting point; it requires quite a bit of time (you need to leave the buns to rise three times) but you do get wonderful buns in the end.

Paul Hollywood’s original recipe is rather tame in terms of spices (there’s just a small amount of ground cinnamon) and also only has a moderate amount of mixed peel (something my hubby loves but I don’t), so in my dairy-free version I increased both, and also added some nutmeg and cloves. The end result was much more satisfying especially the wonderful aroma of warm spices, and I have to admit the extra mixed peel works well.

The recipe uses fast-action or easy-blend yeast, but I’ve successfully used normal dried yeast as well. Look at last year’s recipe for instructions. I also like to soak my sultanas (or raisins) for half an hour in just boiled water before adding them to the dough so they’re lovely and plump, but that’s entirely up to you.

Several weeks ago I saw some amazing hot cross buns on Instagram by Burch & Purchase, a wonderful cake shop in Melbourne, Australia. They had the most incredible crosses on top. Instead of the usual traditional white flour mixture being piped on, it had been brushed on with very evident brush strokes (check out Burch & Purchase’s Instagram feed to see them and their other incredible creations). I attempted something similar with a thinner flour mixture and a brush, but as you can see it wasn’t a great success. I’ve left the instructions for the more traditional method!

EasterI used a sugar and water glaze on my finished buns last year which worked very well. This year I used a sugar and orange juice glaze, so as not to waste the orange whose zest you need. It’s very tasty although stays much stickier than the water version.

DAIRY-FREE HOT CROSS BUNS

Prep time: 30 mins (plus 3 x 1 hour of proving)
Cook time: 12-15 mins
Makes 16 buns
Freezable

300ml non-dairy milk (I used lactose free dairy drink)
3 tbsp vegetable oil (I used rapeseed oil)
500g strong bread flour
1 tsp salt
75g caster sugar
7g sachet fast-action or easy-blend yeast
1 egg, beaten
100g sultanas or raisins
75g mixed peel
zest of 1 orange
1 apple, peeled, cored and finely chopped
2 tsps ground cinnamon
1 tsp nutmeg
1/4 tsp cloves

For the cross:
75g plain flour
water

For the glaze:
25g caster sugar
25ml freshly squeezed orange juice

In a small saucepan, bring the non-dairy milk to the boil. Remove from the heat and add the oil. Leave to cool until it reaches a temperature you can put your hand into.

Put the flour, salt, sugar and yeast into a bowl (keeping the salt away from the yeast). Make a well in the centre. Pour in the warm milk and oil mixture, then add the egg. Using a wooden spoon, mix well.

Use your hands to bring the dough together then tip onto a lightly floured surface. Knead for about 5 minutes until smooth and elastic.

Put the dough in a clean and lightly oiled bowl. Cover with oiled cling film (to stop the dough drying out) and leave to rise in a warm place for 1 hour or until doubled in size.

Keeping the dough in the bowl, add the sultanas, mixed peel, orange zest, apple, cinnamon, nutmeg and cloves. Knead into the dough, making sure everything is well distributed (this isn’t as easy as it sounds!). Cover and leave to rise for another hour or until doubled in size.

Divide the dough into 16 even pieces. Roll each piece into a smooth ball on a lightly floured work surface.

Arrange the buns on two baking trays lined with baking paper, leaving some space for the dough to expand. Cover (but don’t wrap) with more oiled cling film, or a clean tea towel, and let them prove for another hour.

Heat your oven to 220C (200C fan).

Mix the flour for the cross with about 5 tbsp water to make a paste, adding the water 1 tbsp at a time to achieve a thick paste. Spoon into a piping bag with a small nozzle. Pipe a line along each row of buns, then repeat in the other direction to create crosses.

Bake for 12-15 minutes on the middle shelf of the oven, until golden brown.

Gently heat the sugar and orange juice for the glaze either in a small saucepan or in the microwave.  While the buns are still warm, brush over the sugar syrup over the top of the buns and leave to cool.

What are you favourite foods to eat at Easter? Do you have any family Easter traditions?

Refined sugar-free Easter nests

Nicholas’ preschool has had an Easter display up for a couple of weeks now so Nicholas is already getting excited. We had lots of fun making these simple nests together and even more fun eating the eggs that unfortunately wouldn’t fit in the nests!

AAA1

The nests are based on a recipe all Australians know. Honey Joys were pretty much a prerequisite at birthday parties when I was growing up and now they give me a wonderful feeling of nostalgia.

The standard Honey Joy recipe uses butter, sugar and honey, which are melted together and then stirred through cornflakes. I wanted to make a slightly healthier version, and so replaced the sugar and honey with Sweet Freedom (a natural sweetener made from 100% fruit). You could also use agave nectar, or even honey (as you’re still cutting out the original refined sugar). The end result is just as sugary sweet as I remember but with fewer calories. And I believe that means you can eat more of them!

I’ve also successfully made a dairy-free version of these, using a dairy-free spread instead of the butter. They turned out just slightly softer than using butter, but otherwise I was very happy with the result.

Sweet Freedom nests

SUGAR-FREE EASTER NESTS

Prep time: 5 mins
Cook time: 10 mins
Makes about 12 nests

45g butter or dairy-free spread
2 tbsp Sweet Freedom (or agave nectar or honey)
2 cups cornflakes
Some small chocolate eggs

Preheat oven to 150C and line a cupcake tray with paper cases.

In a small saucepan, melt the butter and Sweet Freedom over a low heat until the butter is frothing a little (if using a dairy-free spread, just melt as it won’t froth).

While you’re waiting, put the cornflakes into a medium-sized bowl.

Pour the melted sweetened butter over the cornflakes and quickly mix to combine.

Spoon the cornflake mixture into the cupcake cases, making nest shapes by leaving a hollow in the centre of each.

Bake for 10 minutes.

Cool a little and while the nests are still sticky, push in some small chocolate eggs.

Cool completely.

Sugar-free peanut and date bites

While I’m not a vegan (and never could be), I like following people who are on Instagram for healthy food inspiration, especially trying to come up with different healthier snacks for Nicholas. One of my favourite vegan Instagrammers is the lovely Two Minute Vegan (@twominutevegan).

A few weeks back she came up with a great idea for a two-ingredient healthy snack bar using just dates and peanuts. I just had to try it!

veganBlending up the dates into a sticky purée produces a wonderfully sweet caramel-like flavour in the finished bites and a seemingly naughty chewy texture. They really do taste like a sugary treat rather than a healthy snack.

The original recipe has a layer of peanuts on the bottom as well as on the top which works well if you’re cutting them into bars, but I just put peanuts on top. Even after cooking they’re quite squidgy, so it’s better to cut them into smaller pieces to avoid a sticky mess particularly with little ones.

Because of their squidgy soft texture, I think this recipe would also be great as pop-in-the-mouth balls, rolled in crushed peanuts before baking.

You really must try making these addictive bites!

SUGAR-FREE PEANUT AND DATE BITES

Prep time: 10 mins
Cook time: 10 mins plus 30 mins in the fridge to harden
Makes 16 squares
Keeps in the fridge for a couple of days

1 1/2 cups unsalted peanuts
1 1/2 cups dates, roughly chopped

Heat your oven to 175C and line a square baking tin (mine is 20cm x 20cm) with baking paper.

Put 1 cup of the peanuts in a food processor and grind until they’re fairly evenly broken up into small pieces.

Add the chopped dates and blend while pouring in two tablespoons of water. Keep adding a little water until you have a thick paste (similar in consistency to a thick peanut butter).

Spread the date and peanut mixture into your prepared tin using the back of a spoon (wet it if the mixture keeps sticking to it). Sprinkle over the remaining 1/2 cup of peanuts and press them in.

Bake for 10 minutes.

Put the bites, still in the tin, in the fridge to harden (at least half an hour) then cut into squares.

vegan