For some reason (I’m trying to think of something other than laziness) it always takes me ages to blog about birthdays. Many of you lovely readers have asked me about the Spider-Man birthday cake I made Nicholas for his third birthday (over 4 months ago!) and how I made it. Well finally it’s here.
Nicholas didn’t actually eat any on the day, or the days that followed. What he did do was pick at the bits of icing that was left on the cake board I lazily just put in the garage after all the cake was eaten. Every time he picked he’d tell me how great the cake was that I made him. He also tells random people about his yummy Spider-Man birthday cake so I guess even if he didn’t eat it, it was a success!
 I made the same chocolate cake I used for Nicholas’ blue birthday cake, which is a very much reduced-sugar version of Angela Nilson’s Ultimate Chocolate Cake. As well as being my ‘go-to’ chocolate cake, its denseness makes a wonderful solid foundation for decorating, it stays moist for several days so can be made ahead of time, and its decadent rich fudginess means one cake can feed a lot of people.
This time I didn’t cut the cooked cake in two horizontally and sandwich together again with ganache; I wanted to make the cake decorating easier and, to be honest, this rich cake really doesn’t need any filling inside.
I originally planned to simply carve a round cake into an oval shape to create Spider-Man’s head, but then I stumbled across Amanda’s Cookin’ while researching Spider-Man parties on Pinterest. Amanda very cleverly cuts a round cake in such a way as to piece together a perfectly-shaped oval that leaves you with only two very small leftover pieces (if I’d gone with my original plan I would have wasted a lot of cake). And don’t worry about cutting your cake into pieces; once you put it back together and decorate it, nobody will ever know was been cut up.
For Nicholas’ first two birthdays I made my own icing (for his first birthday I made my first ever marshmallow fondant icing). This time around I kept it simple and bought ready made icing and it made the whole cake-decorating process SO much easier! And with this wonderful chocolate cake, nobody even notices the icing.
I used the ganache as a crumb coat which traps all the loose crumbs on the outside of the cake (and evens out any little dimples or cracks the cake may have) and helps the icing stick to the cake. I used white chocolate and tinted it red to blend in with the icing, but you could use dark chocolate without any colouring for it to blend in with the cake.
SPIDER-MAN BIRTHDAY CAKE
Prep time: 30-40 mins
Cook time: 1hr 20 – 1 hr 30 mins
Decorating time: 30-40 mins
For the ganache:
100g good quality white chocolate, chopped or broken into fairly small pieces
150ml double cream (pouring type)
A few drops of red food colouring (I used gel colouring to get a strong colour)
For the cake:
200g good quality dark chocolate, about 60% cocoa solids, chopped or broken into fairly small pieces
200g butter, cut into cubes
1 tbsp instant coffee granules
85g self-raising flour
85g plain flour
1/4 tsp bicarbonate of soda
125g light muscovado sugar
125g golden caster sugar
25g cocoa powder
3 medium eggs, lightly beaten
75ml (5 tbsp) buttermilk
To decorate:
500g ready-to-roll red fondant icing
cornflour for rolling out the icing
small amounts of white and black ready-to-roll fondant icing
black writing icing
To make the ganache, pour the double cream into a small saucepan and heat gently over a low heat until it’s just about to boil. Meanwhile put the pieces of white chocolate into a bowl.
Once the cream is almost boiling, take it off the heat and pour it over the chocolate. Stir until the chocolate has melted and the mixture is smooth. Add a few drops of red food colouring and stir through.
Put the ganache in the fridge to cool and thicken while you make the cake.
To make the cake, butter a spring-form 22cm round cake tin and line the base with baking paper.
Preheat the oven to fan 140C/conventional 160C/ gas 3.
Put the pieces of dark chocolate and butter into a medium, heavy-based saucepan. Mix the instant coffee into 125ml cold water and add it to the saucepan. Gently melt over a low heat, stirring regularly so the mixture doesn’t burn on the bottom. (Or melt in the microwave on medium for about 5 minutes, stirring half way through.)
While the chocolate is melting, sift the self-raising and plain flours, bicarbonate of soda and cocoa powder into a big bowl. Add the light muscovado sugar and golden caster sugar and stir getting rid of any lumps.
Once the chocolate mixture has melted, pour it into the dry ingredients and add the beaten eggs and buttermilk. Mix until everything is thoroughly combined and you have a smooth, quite runny consistency. Pour into your prepared tin and bake for 1hr 20-1hr 30 or until a skewer comes out clean and the top feels firm (don’t worry if it cracks a bit).
Leave to cool in the tin (don’t worry if it dips slightly), then turn out onto a wire rack to cool completely. Once cool, put it into the fridge for about 30 minutes to firm up before cutting.
To decorate, follow Amanda’s easy instructions here to turn your round cake into an oval. This is what my cake looked like after cutting and shaping:
 Move your cake to a serving plate or board (I stuck some Spider-Man comic strips onto a thick piece of cardboard and then covered it in clear sticky plastic). Using a knife, spread the ganache over the top and sides of your cake, using it to even out the top.
Dust your work surface with cornflour and roll out your red icing until it’s big enough to cover the cake (about 1/2cm thick). Gently roll it around your rolling pin, place it on top of the cake and gently unroll it. Lightly press the icing around the cake and trim off the excess. If you have any excess cornflour on the icing, brush it off with a clean dry brush.
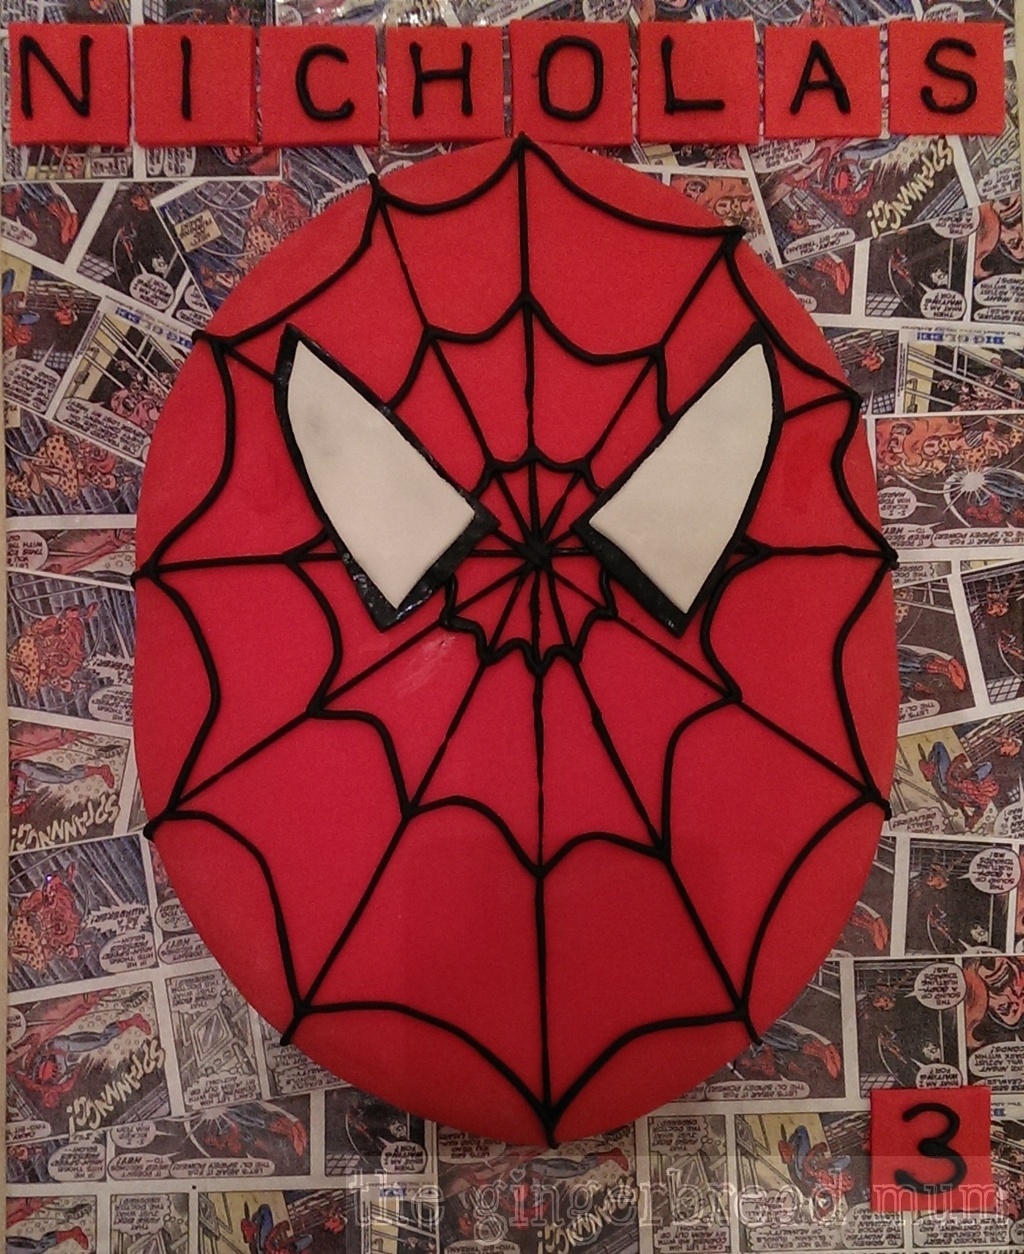
Using the black writing icing, pipe the web starting from the centre and piping straight lines outwards and down the sides. Then add the curved lines. (This makes a great Spider-Man cake as it is.)
 Roll out the small pieces of white and black icing, and cut out two eye shapes from each, making the white shapes a little smaller (I used a template cut out of paper as suggested by Amanda). Dab a little water onto the back of each black eye shape and place in position. Repeat with the white eye shapes.
Now you’re ready for a Spidey-good birthday!
Tips:
- After you’ve poured the cake batter into the tin to cook, make a hollow in the middle almost down to the bottom; when the cake cooks it won’t rise so much in the middle.
- Any leftover red icing can be made into Spider-Man cupcake toppers: use an egg-shaped cookie cutter and leave the pieces to dry for a day then decorate with black writing icing.


