RSS Feed

Author Archives: TheGingerbreadMum

Broccoli soup

Nicholas’ second birthday is quickly approaching (where did that last year go? Hang on, where did those two years go?), hence most of my time in the kitchen is party food planning and preparation. I’m trying very hard to reign my wild ideas in to something more easily achieveable!

But I am continuing my soup crusade and I’m loving the fact that Nicholas is often asking for soup, especially at dinner time. This really has been a successful way to get more veg into him.

Nicholas eating broccoli - look at those chubby fingers!

Initially Nicholas loved broccoli, and happily munched it as one of his first finger foods. That didn’t last long. The only way he eats it now is if he can’t pick it out of whatever new thing I’ve tried to ‘hide’ it in. He can’t get enough of smooth broccoli soup!

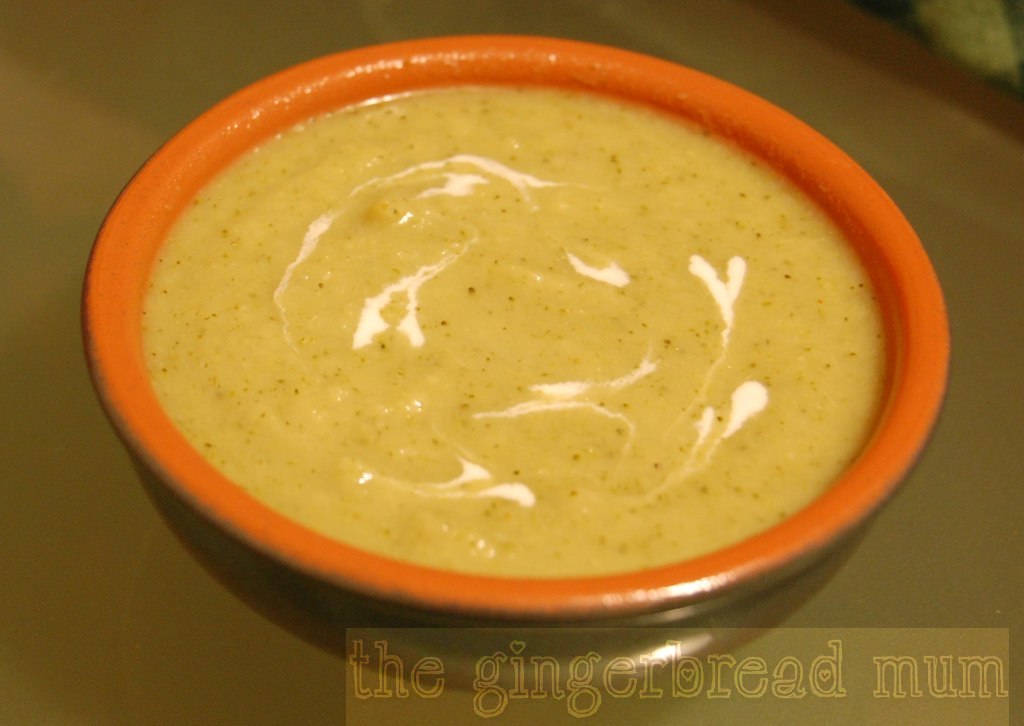
You can make a simple broccoli soup with broccoli, onion and potato, but when I came across a different take on the standard version which has white beans and ginger I knew I had to try it.  Melissa and Jasmine Hemsley’s broccoli, ginger and white bean soup uses the whole head of broccoli, fresh ginger for a healthy zing and white beans to boost the nutritional value even more. The two sisters are the founders of Hemsley & Hemsley, promoting healthy food.

I decreased the zing in the soup (for younger taste buds) by using ground ginger instead of fresh and omitting the lime juice,  but I did leave in the pinch of cayenne pepper and all 5 cloves of garlic (use your knowledge of your family’s tastebuds to decide, but I’d err on the side of caution initially with little ones). I also reduced the salt by leaving out the Tamari soy sauce. Next time I’ll try using fresh ginger, but a smaller piece than the original recipe. I love the extra thickness you get using some white beans (I think they’ll often be added to my soups from now on!).

This makes a large quantity of soup; perfect for freezing the leftovers for another week.

broccoli soup

BROCCOLI SOUP

Prep time: 15 mins
Cook time: 18-20 mins
Makes 6 adult servings
Freezable

600g broccoli
2 onions, roughly chopped
5 cloves of garlic, roughly chopped
1 tbsp vegetable oil (the original recipe uses coconut oil)
1 tsp ground ginger
a small pinch of cayenne peper
1 litre of good quality vegetable or water
1 400g can of white beans (I used butter beans but you could use cannellini or haricot beans), rinsed and drained
salt and pepper

In a large pot, gently fry the onion, garlic, ground ginger and cayenne pepper in the oil over a medium-low heat for 5 minutes.

Remove the heads from the broccoli and roughly chop, then roughly chop the stems.

Add the broccoli stalks and about 750ml of the stock to the pot. Bring to the boil then reduce the heat to low, cover and simmer for 8-10 minutes.

Add the broccoli heads and white beans, cover and cook for another 5 mins until the broccoli stalks are tender.

Take off the heat and puree until smooth. Check if you need to add any seasoning.

Variations:

  • For older eaters, serve with a sprinking of toasted pine nuts or seeds.
  • Serve with a squeeze of lemon or lime juice.
  • Take out some of the broccoli heads before pureeing, then add for a chunkier soup.
  • Serve with a small piece of soft spreadable cheese swirled through.

The fluffiest pancakes

Today is pancake day (Shrove Tuesday). It marks the last day before Lent, which traditionally is a period of abstinence, and what better excuse for your family to start the day with something more indulgent than your usual cereal and toast?

Many people like their pancakes thin, similar to crepes. I’ll happily eat those but usually filled with a savoury filling. For me, sweet pancakes have to be thick and fluffy, stacked high and topped with fruit.

My lovely niece Emily made these for us for Christmas breakfast. It’s a fantastic recipe from Exclusively Food that doesn’t need an extra standing time, and produces pancakes that aren’t too sweet and are perfectly fluffy (even the first one you make).

I’ve made no changes to the original recipe – they’re absolute perfection! However, they do suggest using the back of a spoon to spread out the batter, just as you pour it into the pan, to form an 11cm diameter circle. You could do this if you prefer thinner pancakes; I just let the batter spread on its own to keep them thick (and they spread to the same diameter anyway).

The fluffiest pancakes

THE FLUFFIEST PANCAKES

Prep time: 15 mins
Cook time: 20-25 mins
Makes about 12 medium pancakes

375ml (1 1/2 cups) full cream milk
2 tsp (10ml) lemon juice
35g (2 tbsp) sugar
225g (1 1/2 cups) self-raising flour
1/4 tsp bicarbonate of soda
1 large egg
30g (1 1/2 tbsp) butter, melted
Extra butter, for greasing pan

Mix the milk, lemon juice and sugar in a medium bowl, then set aside for five minutes. (It might develop a slightly curdled look during this time.)

Sift the flour and bicarbonate of soda together into a large bowl.

Break the egg into the milk mixture and add the melted butter. Whisk until the egg has combined with the milk (don’t worry it the butter just floats on the surface).

Add the milk mixture to the flour mixture and whisk quickly until almost smooth (the batter should still have a few small lumps). Don’t overmix the batter as this can make the pancakes tough. Leave the batter to rest while the pan is preheating (at least two minutes).

Heat a large non-stick frying pan over a medium heat. Melt a little butter in the pan to lightly grease it.

For each pancake, scoop 1/4 cup of the batter into the pan. Cook only two or three at a time, otherwise turning the pancakes will be difficult.

Cook the first side until small bubbles appear and burst on the surface (about 1-2 minutes).

Turn over with a spatula and cook until the second side is lightly browned and the pancakes are cooked through (another 1-2 minutes).

Cover with a clean tea towel to keep warm while you finish making the others. Add a little more butter to grease the pan each time and keep checking the temperature of the pan as it will probably need to be reduced as the pan heats up with use.

Random acts of kindness and my darling daughter

Today would have been my darling daughter Sofia’s fifth birthday. She should have been a little girl full of life and full of love for her little brother. Instead my body and soul ache enormously for her.

Grieving for your child is unimagineable. Even when it happens to you, the overwhelming feeling is it’s not true, that something so traumatic couldn’t possibly have happened. I feel this even after five years.

I tried to push a lot of people away during my first period of unbearable grief. If I’m honest, I pushed EVERYONE away. I was very lucky to have an incredible circle of dear friends who didn’t let me push them out of my life, and even luckier to have an amazing husband who, while battling his own grief, understood my need to shut the world out for a while.

I’m not sure how I got through the deepest time of grief and depression. But the unexpected thoughts and messages from others definitely helped. And these random ‘reaching outs’ weren’t always from my friends and family; I was sent support and love from strangers from across the world. Even now, I feel lifted up when someone unexpectedly tells me how much they still think of Sofia or asks how I’m coping. These random acts of love give me strength.

Whether or not you experience trauma in your life, everyone’s life is a rollercoaster, and it’s often the kindness of others which helps us crawl our way back up. I was reminded of this while reading Lou’s post (Random Acts of Kindness) on her new blog Three’s a Family. She used to blog as Homeless Mummy, but thankfully needed to start a new blog.

Lou’s continuing the blog hop started by Clara who wants to remind us of the power of little gestures by paying that kindness forward. So I would like to pay forward a little bit of the love I’ve received.

For the first three people to comment on this post, I’m going to send you a little surprise that will hopefully make your day a little cheerier. I’m not going to do it immediately, but at some point over the next couple of months in order to hopefully catch you off guard (unexpected random acts of kindness are much better than expected ones!). Make sure you leave a way I can contact you in your post (email address, Twitter name or website address, for example).

If you’d like to join the blog hop and send some kindness to others, read Clara’s post here and join up here.

Never underestimate the power of little things

random acts of kindness

Dairy-free banana bread

I didn’t realise how much I used bananas in cooking until I started writing this blog! There’s banana muffinsbanana teething biscuits, banana chips, banana icecream, banana pikelets, banana and butternut squash loaf, and they’re also my ‘secret’ sweetener in my sugar-free flapjacks. And these are just the recipes I’ve blogged!

Banana is commonly one of the first solid foods a baby experiences, and I think I probably just tried different things with them as Nicholas always loves them.  I also pretty much constantly have some very ripe ones in the freezer waiting to be turned into something yummy.

I’ve tried many banana bread recipes over the years with varying degrees of success. Most of the time I prefer mine to be light and fluffy like a sponge, rather than heavy and moist. And while I adore cream cheese frosting, for me this banana bread is much better without it distracting your taste buds. It also means I feel less guilt when eating it for breakfast.

dairy-free banana bread

Banana bread recipes are quite similar overall with a different tweak here and there. My recipe isn’t anything new, but it’s evolved from combining recipes I’ve come across and experimenting until I was happy.

One thing you might want to experiment with is the texture of the mashed banana. Some cooks puree it with a blender while others leave it quite chunky. Supposedly pureeing it gives a richer banana flavour to the finished product. I mash my bananas with a fork, but mash about half of them until they’re very smooth and the remainder I only mash a little so you find the occasional chunk in the finished bread.

There’s quite a bit of banana in this recipe, but you can easily get away with less; even two smallish bananas would work fine (you want at least 175g of it unpeeled).

DAIRY-FREE BANANA BREAD

Prep time: 10-15 mins
Cook time: 40-45 mins
Freezable

175g self-raising flour
2 1/2 tsp baking powder
175g golden caster sugar
2 eggs
1/4 cup vegetable oil
2 1/2 medium bananas, mashed
50g walnuts (or pecans), chopped

Preheat the oven to 160C. Line a loaf tin with baking paper.

Whisk the sugar, eggs and oil together at a medium speed using a handheld beater or in an electric mixer. Whisk for a few minutes until it’s pale and fluffy.

Sift in the flour and baking powder, add the mashed banana, and mix until combined using a low speed. Gently stir through the walnuts.

Pour into your prepared tin and bake for 40-45 minutes until a skewer comes out clean.

Variations:

  • Make individual muffins instead of a loaf (easier to freeze if you’re not going to eat all of it)
  • Dust with icing sugar
  • Top with cream cheese frosting for a more decadent loaf

dairy-free banana breadI’m linking up this recipe to the One Ingredient Challenge hosted by Franglais Kitchen and How to Cook Good Food. Why not enter your own banana recipe and join the linky party? Read the rules here.

Lemon slice

This is an indulgent recipe, perfect to make for the weekend ahead when everyone needs a bit of pampering and food love.

I’m not sure if this is Australian, but I’ve never seen it outside of Oz (please correct me if I’m wrong!). It’s one of the many foodie things I forget about not living there, and my reaction is always ‘I haven’t eaten that in so long! Why did I forget it when it’s so delicious?!?’

This time around it was the mum of my dearest and oldest friend who made it, and I without any embarrassment or shame (surprisingly for me), ate piece after piece after piece (it was better that I didn’t keep count!).

lemom slice

This has to be one of the simplest recipes possible. It involves no cooking, just crushing and mixing the few ingredients in a food processor then pressing into a tin. I let Nicholas push the button on the food processor for his very first time making this slice. He leaned towards the safety of mum during its loud bursts, a bit unsure, but he also loved pushing that button!

If you’re making this with kids, instead of using a food processor, you can get them to crush the biscuits in a secure and clean plastic bag with a rolling pin (lots of fun!), then mix in the rest of the ingredients by hand.

Try it, but I take absolutely no responsibility for how many pieces you’ll be eating 😉

LEMON SLICE

Prep time: 20 mins
Cook time: 0 mins 🙂
Makes about 20 slices

250g plain sweet biscuits
1/2 tin (about 200g) condensed milk
125g butter, melted and cooled
1 cup desiccated coconut
1 lemon, zested and juiced
1 cup icing sugar

Line a square or rectangular cake or slice tin (mine is 20 x 20cm) with baking paper.

Crush the biscuits in a food processor until there aren’t any big chunks left. Add the condensed milk, melted butter, coconut and lemon zest. Pulse to combine.

Press the mixture into the tin using the back of a spoon to spread it evenly. Put into the fridge to set for at least a couple of hours.

To make the icing, stir 1 tsp of lemon juice into the icing sugar, adding more lemon juice a tiny bit at a time until the mixture coats the back of the spoon. Pour over the base and let it set in the fridge for another hour or so.

Cut into squares and devour.

Variations:

  • use orange zest and juice instead of lemon to make a sweeter citrus slice
  • if you’re not a big fan of coconut, you can leave it out in the base
  • if you are a big fan of coconut you can sprinkle some extra over the icing
  • ice with chocolate icing instead
  • use ginger biscuits for a tangy lemon slice

Tip: a lazy way to make the lemon icing is to put the icing sugar and 1 tsp of lemon juice in a saucepan with 1 tbsp butter. Stir over a low heat until it’s smooth. Add more lemon juice if it’s too thick.

Courgette (zucchini) soup

Yes, another soup recipe! Since returning to the cold weather of the UK I’ve been making soup at least once a week. It really is (for me anyway) an easy way of getting more vegetables into Nicholas’ diet. We’ve even sometimes been having a small mug of soup for an afternoon snack (often with a straw just for fun!).

Making soup is generally quick, only requiring a bit of chopping, a bit of stirring, usually followed by some blending. Then it’s ready and waiting in the fridge for the next few days. Any leftovers go in the freezer for another day.

As with all cooking, the fresher your ingredients the better the end taste will be. And with soup, although stock made from a stock cube (preferably low-salt if cooking for little ones) is absolutely fine, if you use a better quality stock (either bought or homemade) you will taste the difference.

You don’t need great knife skills when making blended soups. However, the smaller you chop the vegetables (especially the potatoes), the quicker they’ll take to cook.

courgette (zucchini) soup

COURGETTE (ZUCCHINI) SOUP

Prep time: 10 mins
Cook time: 15-20 mins
Makes 4 adult servings
Freezable

2 large or 3 medium-sized courgettes (zucchini), diced
1 onion, diced
1 medium-sized potato, diced
1 tbsp olive oil (or butter)
500ml hot vegetable or chicken stock
salt and pepper

Heat the olive oil in a medium-sized pot over a medium heat. Add the courgettes, onion and potato, and sauté for 5 minutes without letting the vegetables brown (turn the heat down if they do start to brown).

Pour in the stock, bring to the boil then turn the heat down to low and simmer until the vegetables are soft (about 10 minutes if you’ve diced them into small pieces).

Remove from the heat and purée until smooth. Add salt and pepper if needed.

To make it more special, serve with a dollop of yoghurt or cream and a sprinkling of chives.

Spiced carrot muffins

spiced carrot muffins

Nicholas loves making and eating ‘muffles’ (that’s muffins to you and I!). I’m not sure he understands that what he’s stuffing into his mouth are the fruits of his zealous stirring and pouring, but that doesn’t matter; we both like eating them.

While these muffins aren’t sugar-free, I have reduced the sugar a lot. With the healthy carrot, seeds and sweet raisins inside, as well as some wholemeal flour, I think the amount of sugar is ok. And adding a pinch of extra sugar on the top makes them seem much sweeter than they are 😉

You can easily leave out the seeds, but I like the different texture they add to the muffins. I also like sprinking a few more over the tops before baking.

SPICED CARROT MUFFINS

Prep time: 10-15 mins
Cook time: 18-20 mins
Makes 12 regular-sized muffins
Freezable

150g white self-raising flour
100g wholemeal self-raising flour
75g golden caster sugar
1 tsp baking powder
1 tsp ground cinnamon
1/2 tsp ground ginger
1/4 tsp nutmeg
30g raisins
20g pumpkin seeds
20g sunflower seeds
125ml vegetable oil
125ml milk
1 egg
1 large carrot, grated
Extra golden caster sugar for sprinkling

Preheat the  oven to 180C and grease your muffin tin with a little oil or cooking spray (or line your tin with paper cases to avoid washing the tin).

In a medium-sized bowl, mix the white and wholemeal flours, the caster sugar, baking powder, cinnamon, ginger and nutmeg. Stir in the raisins, pumpkin seeds and sunflower seeds, until evenly distributed.

In a jug or another bowl, whisk the oil, milk and egg together. Squeeze the excess liquid from the grated carrot and stir it through the milk mixture.

Pour the milk mixture into the dry ingredients and mix until just combined (mixing too much will make your muffins heavy and dense).

Pour into prepared tin and bake for 18-20 mins until golden on top and cooked through when tested with a skewer.

spiced carrot muffins

Variations:

  • add chopped walnuts or pecans instead of the pumpkin and sunflower seeds

Tip: soak the raisins in hot water for about 10 minutes beforehand to become plumper and avoid them drying out while cooking.