RSS Feed

Review: Nurture drinks by Mune Health

I’m a mummy who’s never been overly concerned about keeping the environment completely sterile for little ones, instead believing that exploring the world with some freedom can help build up a child’s protective antibodies. And whether it’s this or simply luck, we’ve been very lucky that Nicholas is a very healthy boy.

Since he’s been going to pre-school every day though, he regularly catches colds. Nothing serious, but then we all tend to catch them off each other!

With the lovely sunny days coming to an abrupt end and the new school year quickly approaching, something that could naturally boost Nicholas’ immunity against germs and infections would be great for all of us.

Nurture is a new juice drink for children that does just that – a fruity water drink (50% pure fruit juice and 50% water) with no added sugars, sweeteners or preservatives, and with added vitamins. It’s like a multi-vitamin in a drink.
Mune Health

The company behind Nurture, I MUNE, was founded by husband and wife Lucie and Derek Sanders, who came up with the idea for the drink after unsuccessfully searching for products to strengthen their children’s immunity.

In each pouch of Nurture you’ll find 100% of the optimum daily amounts of key ingredients for a 2-5 year old child:

  • Wellmune WGP 100% natural beta glucan (which comes from baker’s yeast), which has been clinically proven to strengthen key immune cells that help keep the body healthy (read more about it here);
  • Vitamins B6, B9, B12, C, D, and zinc, which contribute to the normal function of the immune system;
  • Calcium and Vitamin D, which are needed for normal growth and development of bones in children.

I Mune Nurture fruity water pouch
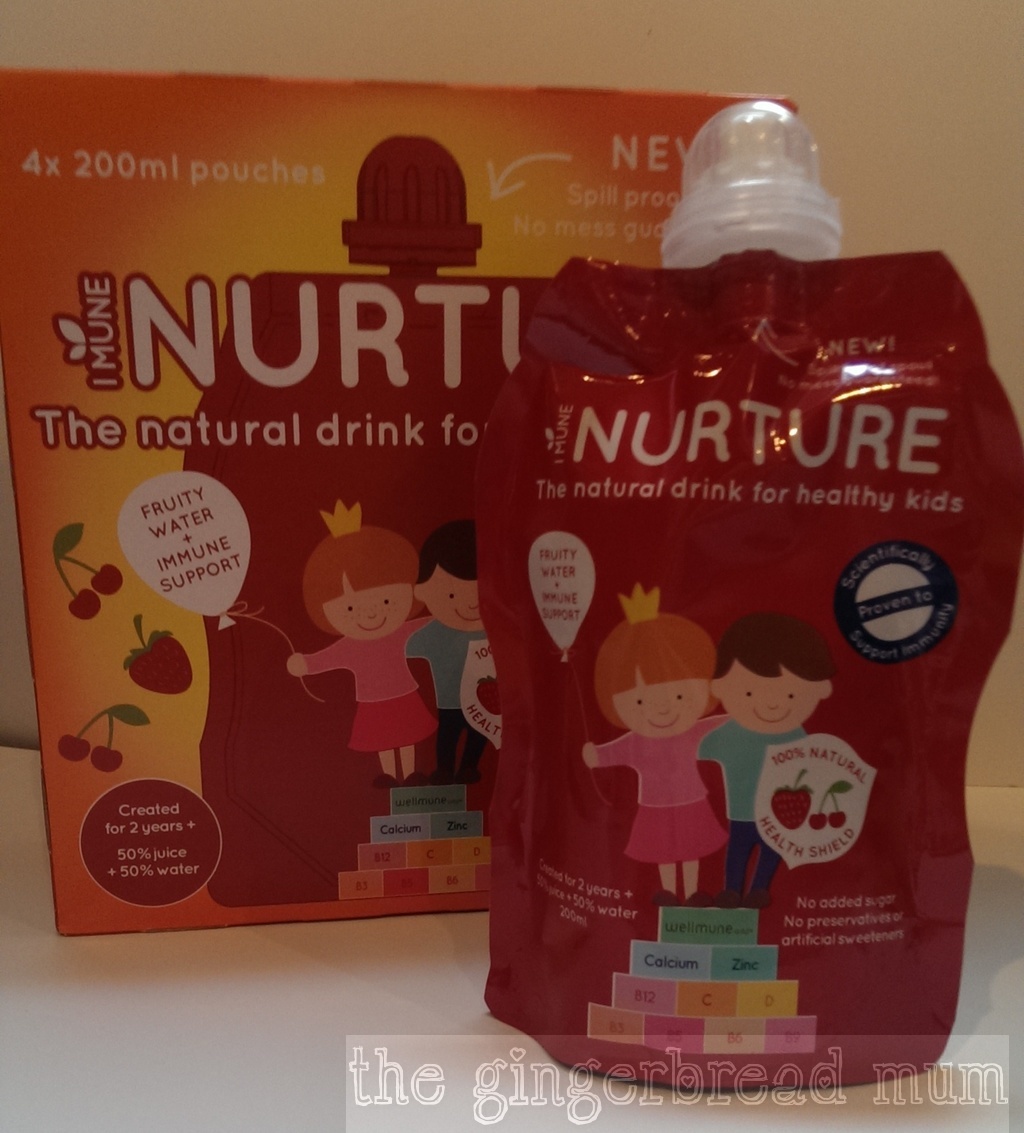
Available in two flavours (strawberry and cherry, and orange and pineapple), it comes in a 200ml spill-proof pouch that can be closed and reopened making it perfect for throwing in a bag for when you’re out and about. The spill-proof spout which has to be pressed down as you drink (not as complicated as it sounds) means munchkins who like to squeeze their pouches aren’t able to make a mess. You can definitely tell parents came up with this product!
Nicholas trying Nurture orange and pineapple juicy water

But what did my juice-loving taste-tester think? After being told they were for him, Nicholas had opened a box before I got a chance to take any photos. He drank his first pouch very quickly (almost in one go) then asked for another, telling me ‘It’s very yummy juice, mummy!’ Nothing for me to add, except that the next day I sneakily had a taste and I can confirm it is very yummy.

Nurture is a brilliant idea whether you just want to give your child a healthier juice drink or also want to give their immunity a boost. It definitely has to be the easiest way to give your little one the equivalent of a multi-vitamin tailored to their specific needs. Now if only they would come up with one for adults…
Nicholas finishing his yummy Nurture fruity water

You can buy Nurture in multipacks of 4 pouches at Tesco (RRP £2.99) and, if you’re quick, you can get a £1 off voucher if you visit the Mune Health site.

Disclosure: we received two multipacks of Nurture for the purpose of this review. Our opinions are honest and our own.

Lemon Myrtle Swiss Roll

The Great British Bake Off is back on which makes me very happy, and this year I wanted to do something I didn’t get round to last year – join in the Great Bloggers’ Bake Off run by Jenny at Mummy Mishaps.

The idea is to bake something inspired by the challenges on that week’s show, whether copying a recipe done or coming up with something yourself. This week was Swiss rolls, Mary Berry’s cherry cake and miniature British classics.

As soon as I saw some of the contestants making coloured patterned Swiss rolls, I knew that’s what I wanted to try!

I’ve seen some of my favourite foodie bloggers making the cutest Swiss rolls using silicon templates like these:
cute Swiss roll silicon sheetsAnd what Minion fan wouldn’t love to eat these?!?
minnion-cake-rolls-cupcakepedia

Absolutely amazing, but I didn’t want to be overly ambitious as each separate colour you use adds to the preparation time (and my piping skills leave a lot to be desired!). You do the pattern first, one colour at at time, either freezing the batter, or cooking it for a very short time, to set it in place and stop it bleeding into the rest of the roll. You then pour the rest of the batter over the top and cook the whole sponge.

Patterned Swiss roll decided, but what about the flavour? I wanted to do something a bit different. When I saw my lovely blogger friend Blue’s creation inspired by her childhood memory of an Aussie honey roll with the twist of lavender, I remembered the Australian herbs and spices my wonderful hubby brought back from a work trip to Melbourne. Powdered lemon myrtle was the first one I pulled out and my decision was made.

You can learn more about lemon myrtle here and I’ve found it to buy in the UK here. It has the most amazingly strong lemon aroma and you really get the sense of it being a wild bush plant when you taste it in something. However, you can substitute it with lemongrass powder or lemon verbena for a similar more earthy lemon flavour.

I used my husband’s Swiss roll recipe converting his very easy to remember ‘3-3-3’ formula (3 dessert spoons of plain flour, 3 dessert spoons of sugar and 3 eggs) to grams. His Swiss rolls always turn out wonderfully light using just the whisked egg whites to make it fluffy; unfortunately mine didn’t. Whisking the egg whites a bit to make the batter for the pattern, waiting for that to freeze and then whisking the whites again to fold into the main batter didn’t work that well (and hubby wasn’t impressed!). Next time I do a patterned Swiss roll I’ll use self-raising flour to produce a more stable batter.

Great British Bake Off

LEMON MYRTLE SWISS ROLL

Prep time: 30 mins plus 15 mins freezer time to set your pattern
Cook time: 8-10 mins
Makes one roll

3 eggs
50g caster sugar
50g plain flour
1 tsp ground lemon myrtle
small amount of green food colouring gel

For the cream filling:
200ml double (or whipping) cream
1 tsp ground lemon myrtle
2 tsp caster sugar

Draw your leaf pattern on a piece of paper slightly smaller than your baking tray. Place it on your tray and cover with a piece of baking paper. (If the baking paper doesn’t stay flat, dab a little butter on the tray around your paper pattern and use it to stick the baking paper in place.)

Separate the eggs putting the yolks into a medium-sized mixing bowl and the whites into a bowl big enough to beat them (a metal one is supposedly better for beating egg whites).

Add the 50g of caster sugar to the egg yolks and beat by hand with a whisk until it’s turned a paler colour. Keep beating and add the flour a spoonful at a time and then the lemon myrtle.

Put 2 tablespoons of the egg and flour mix in a small bowl and add a very small amount of food colouring gel to get your required shade.

Using an electric beater, whisk the eggs whites until soft peaks have just started to form.

Add 2 tablespoons of the whisked egg whites to the sponge batter you put in the smaller bowl and mix together (you don’t need to worry about the whites collapsing). Keep adding egg white until you have a fairly runny mixture similar to the consistency of single cream.

Put in a small clean resealable bag and squeeze the mixture to a bottom corner. Snip the corner off (it needs to be very small!) and pipe your design onto your prepared tray using your pattern as a guide.
My template and my simpler piped leaves

Put your tray into the freezer for 15 minutes.

Preheat your oven to 175C.

Just before you take your tray out of the freezer, whip your remaining egg whites a little bit more until you just have firm peaks. Add about a third of the egg whites to the remaining sponge batter and thoroughly mix.

Take your tray out of the freezer.

Gently fold the rest of the egg whites into the sponge batter and pour the batter into your tray using a spatula to very gently cover your design without smudging it.

Bake for 8-10 minutes until lightly golden brown.

Keeping the sponge on the baking paper, roll it up tightly while it’s still warm and leave to cool.
lemon myrtle

To make the cream filling, whip the double cream, lemon myrtle and sugar until stiff.

When the sponge has cooled, gently unwrap it and peel off the baking paper.

Trim the sides and spread the cream over the sponge (putting slightly more at the end you’ll start rolling it up and slightly less at the other).

Roll up the sponge as tightly as you can and trim the end just before you finish rolling. Chill in the fridge to firm up for at least an hour.

Great British Bake Off

What pattern would you try on a Swiss roll? Something for a birthday or Christmas perhaps?

To join in the Great Bloggers Bake Off or to see the other baking efforts, visit Mummy Mishaps.

gbbo-badgesmallI’m also linking up with Supergolden Bake’s #CookBlogShare party.

cookblogshare


Dinotastic holidays

The second week of the summer holidays is over and I’m exhausted! I don’t remember how I coped when Nicholas was at home full-time!

To prepare for the holidays I made a list of activities. Both Carole (Carole Finds Her Wings) and Pinterest gave me lots of ideas for activities to do both at home and going out. I thought I’d have a theme each week (which is probably the teacher in me coming out) and dinosaurs came to mind immediately. In fact we’ve continued out dinosaur activities for two weeks now and I still have plenty other dino-related ones left on my list.

To start with, a couple of dinosaur meals.

Dinosaur mummies sitting on their tomato ‘eggs’:

dino mummies

Stegosaurus toast, which got a great reaction from Nicholas!:

stegosaurus toast

I bought a dinosaur activity book with lots of lovely stickers, and we made salt dough which we used to make foot imprints of Nicholas’ various dinosaurs. He also liked covering his dinosaurs in salt dough which meant they then all needed a bath!

We made dinosaur feet (perfect for stomping) although Nicholas prefers wearing them as claws!

dino feet

And I decided very late one night to try making a bath bomb with a surprise inside as Nicholas is a new fan of bath bombs. Not the easiest thing to do late at night, especially when I didn’t have any small dinosaurs to use, but it was lots of fun the next day.

What on earth could be inside?!

What on earth could be inside?!

Dinosaur bath bombWhen I did buy some small dinosaurs, I put some in an empty ice cream container, covered them in water and froze them. The next day we excavated them. I’m not sure what Nicholas was more excited about – discovering dinosaurs in the ice or getting to use the heavy meat tenderiser to bash them out!

dino ice excavation

Do you have any suggestions for other dino-related activities to keep us busy over the holidays?


Spider-Man Birthday Cake

For some reason (I’m trying to think of something other than laziness) it always takes me ages to blog about birthdays. Many of you lovely readers have asked me about the Spider-Man birthday cake I made Nicholas for his third birthday (over 4 months ago!) and how I made it. Well finally it’s here.

Nicholas didn’t actually eat any on the day, or the days that followed. What he did do was pick at the bits of icing that was left on the cake board I lazily just put in the garage after all the cake was eaten. Every time he picked he’d tell me how great the cake was that I made him. He also tells random people about his yummy Spider-Man birthday cake so I guess even if he didn’t eat it, it was a success!
Spider-Man birthday cakeI made the same chocolate cake I used for Nicholas’ blue birthday cake, which is a very much reduced-sugar version of Angela Nilson’s Ultimate Chocolate Cake. As well as being my ‘go-to’ chocolate cake, its denseness makes a wonderful solid foundation for decorating, it stays moist for several days so can be made ahead of time, and its decadent rich fudginess means one cake can feed a lot of people.

This time I didn’t cut the cooked cake in two horizontally and sandwich together again with ganache; I wanted to make the cake decorating easier and, to be honest, this rich cake really doesn’t need any filling inside.

I originally planned to simply carve a round cake into an oval shape to create Spider-Man’s head, but then I stumbled across Amanda’s Cookin’ while researching Spider-Man parties on Pinterest. Amanda very cleverly cuts a round cake in such a way as to piece together a perfectly-shaped oval that leaves you with only two very small leftover pieces (if I’d gone with my original plan I would have wasted a lot of cake). And don’t worry about cutting your cake into pieces; once you put it back together and decorate it, nobody will ever know was been cut up.

For Nicholas’ first two birthdays I made my own icing (for his first birthday I made my first ever marshmallow fondant icing). This time around I kept it simple and bought ready made icing and it made the whole cake-decorating process SO much easier! And with this wonderful chocolate cake, nobody even notices the icing.

I used the ganache as a crumb coat which traps all the loose crumbs on the outside of the cake (and evens out any little dimples or cracks the cake may have) and helps the icing stick to the cake. I used white chocolate and tinted it red to blend in with the icing, but you could use dark chocolate without any colouring for it to blend in with the cake.

SPIDER-MAN BIRTHDAY CAKE

Prep time: 30-40 mins
Cook time: 1hr 20 – 1 hr 30 mins
Decorating time: 30-40 mins

For the ganache:
100g good quality white chocolate, chopped or broken into fairly small pieces
150ml double cream (pouring type)
A few drops of red food colouring (I used gel colouring to get a strong colour)

For the cake:
200g good quality dark chocolate, about 60% cocoa solids, chopped or broken into fairly small pieces
200g butter, cut into cubes
1 tbsp instant coffee granules
85g self-raising flour
85g plain flour
1/4 tsp bicarbonate of soda
125g light muscovado sugar
125g golden caster sugar
25g cocoa powder
3 medium eggs, lightly beaten
75ml (5 tbsp) buttermilk

To decorate:
500g ready-to-roll red fondant icing
cornflour for rolling out the icing
small amounts of white and black ready-to-roll fondant icing
black writing icing

To make the ganache, pour the double cream into a small saucepan and heat gently over a low heat until it’s just about to boil. Meanwhile put the pieces of white chocolate into a bowl.

Once the cream is almost boiling, take it off the heat and pour it over the chocolate. Stir until the chocolate has melted and the mixture is smooth. Add a few drops of red food colouring and stir through.

Put the ganache in the fridge to cool and thicken while you make the cake.

To make the cake, butter a spring-form 22cm round cake tin and line the base with baking paper.

Preheat the oven to fan 140C/conventional 160C/ gas 3.

Put the pieces of dark chocolate and butter into a medium, heavy-based saucepan. Mix the instant coffee into 125ml cold water and add it to the saucepan. Gently melt over a low heat, stirring regularly so the mixture doesn’t burn on the bottom. (Or melt in the microwave on medium for about 5 minutes, stirring half way through.)

While the chocolate is melting, sift the self-raising and plain flours, bicarbonate of soda and cocoa powder into a big bowl. Add the light muscovado sugar and golden caster sugar and stir getting rid of any lumps.

Once the chocolate mixture has melted, pour it into the dry ingredients and add the beaten eggs and buttermilk. Mix until everything is thoroughly combined and you have a smooth, quite runny consistency. Pour into your prepared tin and bake for 1hr 20-1hr 30 or until a skewer comes out clean and the top feels firm (don’t worry if it cracks a bit).

Leave to cool in the tin (don’t worry if it dips slightly), then turn out onto a wire rack to cool completely. Once cool, put it into the fridge for about 30 minutes to firm up before cutting.

To decorate, follow Amanda’s easy instructions here to turn your round cake into an oval. This is what my cake looked like after cutting and shaping:
Round cake cut to make an ovalMove your cake to a serving plate or board (I stuck some Spider-Man comic strips onto a thick piece of cardboard and then covered it in clear sticky plastic). Using a knife, spread the ganache over the top and sides of your cake, using it to even out the top.

Dust your work surface with cornflour and roll out your red icing until it’s big enough to cover the cake (about 1/2cm thick). Gently roll it around your rolling pin, place it on top of the cake and gently unroll it. Lightly press the icing around the cake and trim off the excess. If you have any excess cornflour on the icing, brush it off with a clean dry brush.

Using the black writing icing, pipe the web starting from the centre and piping straight lines outwards and down the sides. Then add the curved lines. (This makes a great Spider-Man cake as it is.)
Piped websRoll out the small pieces of white and black icing, and cut out two eye shapes from each, making the white shapes a little smaller (I used a template cut out of paper as suggested by Amanda). Dab a little water onto the back of each black eye shape and place in position. Repeat with the white eye shapes.

Now you’re ready for a Spidey-good birthday!

Tips:

  • After you’ve poured the cake batter into the tin to cook, make a hollow in the middle almost down to the bottom; when the cake cooks it won’t rise so much in the middle.
  • Any leftover red icing can be made into Spider-Man cupcake toppers: use an egg-shaped cookie cutter and leave the pieces to dry for a day then decorate with black writing icing.


Banana and nutella muffins

Hannah at Mums’ Days has made a fabulous list of recipes to use up browning bananas. Her 10 ways to use up old bananas includes banana milkshakes and smoothies, banana gelato, banana pancakes, banana bread and also my sugar-free flapjacks (which is without a doubt the most popular recipe on my blog).

Yesterday I needed a ‘pick-me-up’ and seeing the bananas in my fruit bowl that looked like they were very close to walking to the bin on their own, I thought of Hannah’s list, especially The Londoner’s Nutella swirl banana muffins. Perfect!

Banana and nutella muffins

Even though I wanted to eat something indulgent I couldn’t help myself from trying to make Rosie’s original recipe slightly healthier. So I reduced the sugar by a third and substituted some of the white self-raising flour with wholemeal. For muffins, the slightly heavier and denser cousins of cupcakes, you can definitely get away with adding some healthier wholemeal flour.

My taste-testers made no comment about the lack of sugar (and hubby ALWAYS comments if something I make isn’t sweet enough in his opinion). The fact that very ripe bananas are super sweet, plus the addition of Nutella makes it very easy to reduce the sugar content significantly without losing the necessary sweetness needed for it still to be a sweet treat.

I do love Nutella, in particular for how little you can add of it to make something seem much more indulgent than it is. I like adding it to porridge as only half a teaspoon makes the porridge taste wonderfully chocolatey and incredibly indulgent.

When I showed the muffins going into the oven yesterday on Instagram, one of my lovely IG friends asked if I’d tried Lindt ball muffins. I’d forgotten seeing them and was very glad I had! But if you need a more indulgent muffin, why not try popping a Lindt ball into the centre rather than the Nutella; I’m sure they would be divine.

BANANA AND NUTELLA MUFFINS

Prep time: 15 mins
Cook time: 20-25 mins
Makes 12 muffins

115g unsalted butter
80g wholemeal self-raising flour
150g white self-raising flour
100g caster sugar
1/2 tsp salt
2 eggs, lightly beaten
3 very ripe bananas, peeled and mashed
1 tsp vanilla extract
4 tbsp Nutella, at room temperature

Gently melt the butter (I prefer to use the microwave) and leave to cool.

Heat the oven to 180C and lightly grease your muffin tins (or line with paper cases).

In a medium-sized mixing bowl, combine the wholemeal and white flours, the sugar and salt.

In a jug (or smaller mixing bowl), whisk together the melted butter, beaten eggs, mashed bananas and vanilla extract.

Pour the wet mixture into the dry ingredients and mix until just combined (mixing too much can make your muffins dense and chewy).

Divide the mixture evenly between the muffin tin holes (they’ll be about half to three-quarters full depending on the size of your tin). Add a small dollop of Nutella on top of each muffin and use a skewer (or knife) to swirl it through the muffin (not too much or you won’t see any swirls).
banana and Nutella muffins

Bake for 20-25 mins until golden and cooked through when tested with a skewer.

Variations:

  • instead of Nutella, place a piece of chocolate (or Lindt ball!) in the centre of each muffin before baking to make oozing chocolate banana muffins
  • add 1 tsp of ground cinnamon to the mashed banana
  • make banana and Nutella bread/cake by cooking the mixture in a loaf or cake tin

Tip: if your Nutella is still rather hard at room temperature, either place the jar into a sink of hot water or pop the jar (without its lid) in the microwave and zap at a low temperature for intervals of 10 seconds each until it’s slightly runny.

Beetroot and yogurt risotto

Beetroot is a vegetable I’ve only grown to love cooking with recently, most probably as I’ve previously written, my experience of it growing up was ready-cooked, sliced and in tins.

When it’s in season, beetroot features a lot in our weekly delivered fruit and vegetable box, and that’s encouraged me to try using it in different ways. I’ve blogged my most successful recipes to date: beetroot, feta and thyme muffins, pink (beetroot) pancakes and beetroot and yogurt dip. The dip is what got me thinking about making a beetroot risotto.

beetroot and yogurt risotto

Cook your beetroot in your preferred way (or buy it precooked to cook down on preparation time). I like wrapping them in one piece of foil and roasting them in the oven; there’s no need to trim or chop them. Once they’ve cooled, it’s easy to remove the skin. You can also cook them in the microwave.

Surprisingly, this risotto doesn’t taste overly of earthy beetroot and the yogurt gives it a lovely (healthier) richness and creaminess without adding the usual extra butter and parmesan at the end. Kids (and adults) will love the colour and Nicholas happily ate it. I used red wine to add to the colour and liked the extra depth of flavour it gave, but white wine would work just as well.

BEETROOT AND YOGURT RISOTTO

Prep time: 10 mins
Cook time: 20-25 mins
Serves 4 adults

400g cooked and peeled beetroot
1 tbsp olive oil
15g butter
1 onion, finely diced
350g risotto rice (I used Carnaroli)
250ml red wine
1 litre hot vegetable (or chicken) stock
150g Greek yogurt

Roughly chop the beetroot, put the pieces in a small food processor and blend until smooth.

Heat the oil and butter in a medium-sized pot over a medium-low heat. Add the onion and gently fry until softened.

Add the rice and quickly stir it so all the grains are coated. Add the wine and stir until it’s absorbed.

Start adding the stock a ladle at a time, letting it absorb then adding more. Keep doing this until the rice is ready (cooked but still with a little bite, about 15-20 minutes, and still moist). Remove from the heat.

Gently stir through the beetroot then the yogurt. Check for seasoning.

Tip: keep a small piece of beetroot aside and finely dice it to sprinkle over the top before serving.

What are you favourite ways of cooking with beetroot?

Review: Ozeri Stone Earth Pan

I was lucky enough to be sent the Stone Earth Pan by Ozeri to try and have been using it as my only frying pan for the last month.

Stonehenge non-stick

The pan utilises a natural stone-derived coating from Germany called Stonehenge making it one of the world’s first frying pans to combine non-stick perfection with being absolutely free of toxic substances such as PFOA (PerFluorooctanoic Acid), a harmful chemical often found in traditional cookware.

The eco-friendly pan is made from  heavy-gauge die-cast aluminum and has a magnetized base so it can also be used on induction stoves. The comfortable handle is coated in heat-resistant silicon and solidly attached to the pan.

I’ve been very impressed by the Stone Earth Pan. It’s a lovely solid pan without being too heavy that heats quickly and perfectly evenly as its advertising claims. My pan is the middle size in the range (26cm/10″), and is small compared to most of my other frying pans, but its unusually high sides means you can cook a surprisingly good amount in it.

The instructions recommend always having an initial thin film of oil in the pan before cooking. This has worked perfectly for me, but I’ve also cooked bacon, sausages and pancakes without using any oil or butter and the non-stick surface has stilled worked like a dream.

Ozeri Stone Earth Pan with Stonehenge non-stick coating

Cleaning has also been a dream. Unfortunately it’s not recommended to put the pan in the dishwasher. However, even after a month of fairly constant use it only needs a quick wipe with a soapy sponge. Even after cooking my Asian-style salmon whose sticky honey marinade always leaves my other pans needing a soak and then serious scrubbing, the Stone Earth Pan just needed a quick soapy wipe down!

Ozeri Stone Earth Pan with Stonehenge non-stick

The Stone Earth Pan also comes with a fabulous free pan protector, made from thick felt, enabling you to store other pots and pans on top of it without its non-stick surface getting damaged. This is a brilliant extra and it made me wonder why other pan manufacturers don’t do this.

Stonehenge non-stick

I’m now a huge fan of Ozeri and their Stone Earth Pans and the best thing is, unlike other top quality pans, they don’t cost the earth!

Disclosure: I was sent the Ozeri Stone Earth Pan to review. My opinions are honest and my own.